

Ultimate Guide to Setting Up Home Surveillance Cameras
"An ounce of prevention is worth a pound of cure," as the old saying goes, and there's no better way to prevent potential break-ins and monitor your property than by setting up home surveillance cameras. You're likely aware of the peace of mind that comes with being able to keep an eye on things, even when you're not physically present. But do you know the ins and outs of selecting the right cameras, finding the perfect spots for installation, and troubleshooting common setup issues? Stay with us to find out how to secure your home like a pro.
Key Takeaways
- Camera resolution determines the clarity of footage, so consider the desired level of detail when choosing a camera.
- Higher resolution cameras require more storage space, so be prepared to allocate sufficient storage for your surveillance system.
- Night vision capabilities, particularly infrared (IR) technology, are crucial for clear footage in low-light or darkness conditions.
- When selecting optimal camera locations, prioritize common entry points like the front door, rear windows, back door, and garage to ensure comprehensive coverage and security.
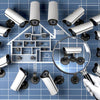
Understanding Different Camera Types
Before you dive into setting up your home surveillance system, it's crucial to understand the different types of cameras available and their unique features. This knowledge allows you to select the best camera that suits your needs. Now, let's focus on camera resolutions and night vision capabilities.
Camera resolutions determine the clarity of your footage. Higher resolutions provide crisp images, but they also require more storage space. For instance, a 1080p camera delivers full HD images, while a 4K camera offers ultra-HD quality. Understanding this aspect will guide you to make a well-informed decision.
Night vision capabilities are another critical feature. Not all cameras are equipped with this, but it's a valuable feature for maintaining security in low-light conditions. Look for cameras with infrared (IR) technology, which uses IR LEDs to illuminate dark areas, enabling the camera to capture clear footage even in pitch darkness.
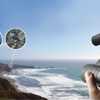
Selecting Optimal Camera Locations
Choosing the best spots for your surveillance cameras is a critical step in maximizing your home's security. You need to consider privacy considerations and think from intruder perspectives.
Here are some guidelines in choosing the optimal locations:
|
Location |
Why It's Important |
Points to Consider |
|
Front Door |
Most intruders enter here |
Ensure the camera isn't easily reachable |
|
Rear Windows |
Often overlooked, easy access point |
Privacy considerations for neighbours |
|
Back Door |
Second most common entry point |
Position camera out of arm's reach |
|
Garage |
Often houses valuable items |
Cover the driveway and the garage door |
Now, let's dive deeper. The front door is a prime spot. However, make sure the camera is positioned out of reach, so an intruder can't easily tamper with it.
For rear windows, remember privacy considerations. Install cameras in a way that respects your neighbours' privacy.
The back door and garage are also critical. Like the front door, position cameras where they can't be easily tampered with. Covering the driveway as well as the garage door ensures maximum security.
Essential Installation Tools
To correctly install your home surveillance cameras, you'll need a few essential tools ready at your disposal. Proper tool maintenance will not only speed up the installation process but also ensure the longevity of your tools. It's important to take safety precautions seriously when working with these tools to prevent any accidents or injuries.
Here's a list of the essential tools you'll need:
- Drill: A power drill will help you make holes in walls or ceilings for mounting the cameras. Ensure it's in good condition and clean before and after use.
- Screwdriver: This is necessary for securing the cameras to your chosen locations. A Phillips-head screwdriver typically works for most cameras.
- Fish Tape: This tool helps in guiding wires through walls and ceilings. It's an essential tool for a clean, professional-looking installation.
- Wire Strippers: This tool is used to remove the insulation from electrical wires. It's vital for connecting your cameras to the power source.
Step-by-Step Camera Setup Process
Now that you've gathered all your essential tools, let's get down to the detailed process of setting up your home surveillance cameras.
The first step is to decide where to place your cameras. You'll need to consider factors such as lighting, field of view, and privacy concerns. Ensure that your cameras are positioned to cover the areas you want to monitor, but also respect your neighbours' privacy.
Next, you'll need to mount your cameras. Use a drill to secure the camera mounts to the wall, then attach the cameras to the mounts. Remember to adjust the cameras to cover the desired areas properly.
Now, let's get to camera connectivity. Connect each camera to a power source and then to your home network. If your cameras are wireless, you'll connect them via Wi-Fi. If they're wired, you'll need to run cables from each camera to your router.
Troubleshooting Common Setup Issues
Occasionally, you might encounter some common issues while setting up your home surveillance cameras, but don't worry, we've got the solutions. These problems often include connection problems and software glitches.
Let's walk through these issues:
- Connection Problems: Sometimes, your camera may not connect to the Wi-Fi. This can be resolved by checking the network settings, ensuring the Wi-Fi password is correct, and positioning the camera within range of the router.
- Software Glitches: If your camera's software is acting buggy, try updating it to the latest version. If issues persist, a reset might be necessary.
- Image Quality Issues: Blurry or pixelated images could be due to camera positioning or resolution settings. Adjust the camera angle or increase the resolution in the software settings.
- Not Recording: If your camera isn't recording, check your storage space. If it's full, you'll need to clear it or add more. Also, make sure the recording settings are correctly configured.
Frequently Asked Questions
What Is the Cost of Maintaining a Home Surveillance System?
The cost of maintaining your home surveillance system can vary. It depends on the system's lifespan and any potential insurance discounts benefits you might get. If you've got a long-lasting system, you'll spend less on replacements. Plus, some insurance companies offer discounts if you have a surveillance system, which can offset maintenance costs. So, you're not just paying for upkeep, you're investing in your safety, potentially saving money on insurance, and prolonging the system's life.
How Can I Ensure My Surveillance System Is Protected From Hackers?
To ensure your surveillance system is safe from hackers, you'll need to take a few crucial steps. Firstly, always use encryption measures. This scrambles your data, making it harder for hackers to access. Secondly, don't forget about firewall protection. It acts as a barrier between your network and potential threats. Update software regularly and change passwords often. These simple actions create a robust defense against unwanted intruders.
What Are Some Top Brands for Home Surveillance Cameras?
When choosing top brands for home surveillance cameras, you'll want to consider features like camera placement strategies and surveillance system customization options. Brands like Nest, Arlo, and Ring offer flexibility in these areas. They allow you to tailor your system to your specific needs, ensuring you're not just buying a one-size-fits-all product. Ultimately, it's about finding a balance between quality, ease of use, and the ability to customize to suit your home's unique needs.
How Often Should I Upgrade My Home Surveillance System?
You shouldn't fix what ain't broken, but when it comes to your home surveillance system, regular upgrades are crucial. It's not just about system compatibility or having the latest tech. A well-maintained system ensures optimal surveillance efficacy. Typically, you should consider an upgrade every 4 to 6 years. Always remember, serving your family's safety is the ultimate goal. So, don't hesitate to make necessary changes to your surveillance setup.
Are There Any Legal Considerations or Restrictions to Setting up Home Surveillance Cameras?
Yes, there are legal considerations when setting up home surveillance cameras. Privacy concerns can arise if your cameras capture areas beyond your property, potentially leading to neighborly disputes. You must ensure you're not infringing on others' privacy rights. It's best to check local laws and regulations. Remember, surveillance is about safety, not spying. Always consider others' comfort and rights when you're setting up your surveillance system.
Conclusion
You've now navigated the complexities of home surveillance, from understanding different camera types to troubleshooting setup issues. Remember, the perfect location and the right tools are key. With this knowledge, you're not just setting up cameras, you're fortifying your home's security. So, put these insights to work, test the theory, and see the difference. In the world of home surveillance, you're no longer a novice, but a well-informed user. Embrace this newfound expertise and secure your peace of mind.
